Some contextual informations
I’ve been using self-managed Gitlab both for work and home projects, and just as anyone would, I’ve learnt to use the Gitlab CI, installing the Gitlab Runner inside various OS, as a simple shell executor on FreeBSD, and also on Docker inside a Linux virtualized guest. I like both, because the shell executor can be a really quick interface on a development server used by many developers, and because Docker let you manage things in fresh containers almost always up to date.
But here’s the catch, there’s a world between these two executors: one is on your development host using FreeBSD and direct host resources, and the other is virtualized. For the virtualized, I’m using FreeBSD, and the guest is a Bhyve Virtual Machine configured on a sub-network to make it completly safe and secure.
I like the shell executor, but I’ve always thought that being able to pull a fresh FreeBSD container when the Gitlab CI starts would clearly be something cool.
If you are into FreeBSD, you perfectly know that there is no FreeBSD Docker image. And you can’t install and FreeBSD Docker service.
Of course, recently there has been some efforts built on Podman, and now you can have FreeBSD Podman containers with fresh and clean FreeBSD OCI images. This comes with limitations, and although I can see some uses into it, they cannot be used as an executor for Gitlab. Podman on FreeBSD is executed as root, so there is no “rootless” Podman. You can use Podman in Podman, but having a Gitlab Runner that uses Podman in Podman does not work because of the current FreeBSD limitations of Podman.
I hope these limitations would get overcome in the future, but I cannot always wait on the future.
Last days, I’ve checked some ISC projects due to software installed on work servers, and I’ve discovered they are using Gitlab Runner Custom Executor with libvirt+qemu on a Linux host.
On FreeBSD, there is libvirt and qemu, so it is possible to use the same technology
but even if I’m finding virsh interesting, I’ve almost always used VM with
Matt Churchyard vm-bhyve project.
I understand why ISC is using libvirt+qemu, and how they build FreeBSD VM images
to suit their needs inside their CI. But I found it not challenging to just use
the same technology and to have to learn and adapt my home FreeBSD computer and
worlflow.
So I’ve decided to adapt it to FreeBSD, and to create a VM-Bhyve Executor.
Topology
My home FreeBSD PC is configured as a Desktop on FreeBSD 14.2-RELEASE, but also can start any services I need, just like a server only machine. It’s on a DHCP sub-network directly connected to Internet. I’ve installed ISC Kea DHCP server and it will serve for the VMs DHCP IP addressing in an other sub-network.
I’m using Bhyve Virtual Machine, that are connected to a bridge sub-network, so they are isolated, even though they can connect to Internet because the FreeBSD PC is acting as a gateway with the addition of some firewall rules using PF.
Because I’m using VM-Bhyve on a ZFS Dataset, they can be snapshot, and created from snapshot.
A self-managed Gitlab server is installed inside a FreeBSD VNET jail, and is also addressed on the same sub-network as the VMs so that they can freely communicate.
Installation
I intently do not talk about the FreeBSD server, the vm-bhyve configuration and its network configuration, the Kea DHCP configuration and the self-managed Gitlab. They are all standard configuration.
The VM-Bhyve Executor will be executed in a Gitlab Runner installed from the latest FreeBSD packages. It will be installed directly on my FreeBSD PC. It will need to be able to:
- clone, start, stop and destroy pre-configured FreeBSD VM snapshot
- get the newly created VM IP address from its MAC address
- to communicate with the VM using SSH
Pre-configured FreeBSD VM
Since the VM will need to communicate as a Gitlab Runner, it needs to be installed with Gitlab Runner. Since 14.1-RELEASE, FreeBSD gives some basic cloud-init images (Raw or QCow2), so it is going to act as a base to create our pre-configured VM.
vm img "https://download.freebsd.org/releases/VM-IMAGES/14.2-RELEASE/amd64/Latest/FreeBSD-14.2-RELEASE-amd64-BASIC-CLOUDINIT.ufs.raw.xz"
vm img
DATASTORE           FILENAME
default             FreeBSD-14.2-RELEASE-amd64-BASIC-CLOUDINIT.ufs.raw
It is necessary to create this base image with sufficient disk resources suiting your CI needs. In this example, it will be a 50GB disk although I do not show the software installed in the final pre-configured VM.
vm create -t freebsd-zvol -s 50G -m 2048 -c 2 -i FreeBSD-14.2-RELEASE-amd64-BASIC-CLOUDINIT.ufs.raw -C -k /path/to/user-public-ssh-key freebsd-142-amd64
vm list
NAME                      DATASTORE  LOADER     CPU  MEMORY  VNC  AUTO     STATE
freebsd-142-amd64         default    bhyveload  2    2048    -    No       Stopped
vm clone freebsd-142-amd64 freebsd-runner-142-amd64
## I need the pre-configured VM to be more bulky
vm configure freebsd-runner-142-amd64
## configure with 4 vCPU and 8192M memory
## exit editor
vm start freebsd-runner-142-amd64
# # wait for the vm to start and run
grep mac /vm/freebsd-runner-142-amd64/freebsd-runner-142-amd64.conf
## use the vm mac address to grep the vm ip address in kea files
grep '{VM MAC ADDRESS}' /var/db/kea-leases4.csv
## first field is the ip address
ssh -i /path/to/user-public-ssh-key freebsd@{VM IP ADDRESS}
sudo -i
echo "vagrant" | pw usermod root -h 0
ASSUME_ALWAYS_YES=yes pkg install sudo [... packages suiting your CI needs]
pw group add -n gitlab-runner
echo "vagrant" | pw useradd -n gitlab-runner -g gitlab-runner -s /bin/sh -h 0
mkdir -p /home/gitlab-runner
chown gitlab-runner:gitlab-runner /home/gitlab-runner
echo "gitlab-runner ALL=(ALL) NOPASSWD: ALL" >> /usr/local/etc/sudoers
fetch -o /usr/local/bin/gitlab-runner https://gitlab-runner-downloads.s3.amazonaws.com/latest/binaries/gitlab-runner-freebsd-amd64
chmod +x /usr/local/bin/gitlab-runner
mkdir /builds
chmod 1777 /builds
## Apply any configurations suiting your CI needs
shutdown -p now
Now that our pre-configured VM is created and configured, unless we need to update it, or recreate it, it can be snapshot.
vm snapshot freebsd-runner-142-amd64@runner
zfs list -rt snapshot zroot/vm/freebsd-runner-142-amd64
NAME                                             USED  AVAIL  REFER  MOUNTPOINT
zroot/vm/freebsd-runner-142-amd64@runner          80K      -   112K  -
zroot/vm/freebsd-runner-142-amd64/disk0@runner  1.60M      -  3.40G  -
This runner snapshot will be used inside the executor script.
Gitlab Runner Executor
Since our executor will be run as gitlab-runner user, which does not have any
special rights (simple unix user), and in order for it to be able to run vm-bhyve
commands, we need to apply some changes to the gitlab-runner FreeBSD package
default installation values, and to install sshpass.
First, we need the installed user to be able to execute some gitlab-runner commands.
So let’s change its default shell from /usr/bin/nologin to /bin/sh.
chsh -s /bin/sh gitlab-runner
Then, vm-bhyve commands can only launched as root, so we also need to configure
some privilege elevation, in this example I’m using sudo but doas could also
be used.
cat <<EOF >"/usr/local/etc/sudoers.d/gitlab-runner"
User_Alias BHYVE = gitlab-runner

BHYVE ALL= NOPASSWD: /usr/local/sbin/vm clone *
BHYVE ALL= NOPASSWD: /usr/local/sbin/vm start *
BHYVE ALL= NOPASSWD: /usr/local/sbin/vm stop *
BHYVE ALL= NOPASSWD: /usr/local/sbin/vm destroy *
BHYVE ALL= NOPASSWD: /usr/local/sbin/vm list
EOF
Our executor script will be run by this gitlab-runner user, from the Gitlab Runner
service installed on our FreeBSD PC. We are using 2 files for this, a script file,
and a environment variable file. Both are installed in the Gitlab Runner configuration
files path.
Their content are:
/var/tmp/gitlab_runner/.gitlab-runner/executor-bhyve.conf
BASE_DIR="/var/tmp/gitlab_runner"
BOOT_TIMEOUT=180
SSH_USER="root"
SSH_PASSWORD="vagrant"
/var/tmp/gitlab_runner/.gitlab-runner/executor.sh
#!/bin/sh

set -e

CONFIG_PATH="/var/tmp/gitlab_runner/.gitlab-runner/executor-bhyve.conf"

# shellcheck source=executor-bhyve.conf
. "${CONFIG_PATH}"

RUNNER_NAME="runner-${CUSTOM_ENV_CI_JOB_ID}"
SSH_KNOWN_HOSTS_PATH="${BASE_DIR}/${RUNNER_NAME}-knonw_hosts"

fatal_error() {
        echo "${1}" >&2
        exit 1
}

get_runner_ip() {
        MAC_ADDRESS="$(grep mac "/vm/${RUNNER_NAME}/${RUNNER_NAME}.conf" | awk -F '"' '{print $2}')"
        if [ -z "${MAC_ADDRESS}" ]; then
                return
        fi
        grep "${MAC_ADDRESS}" "/var/db/kea/kea-leases4.csv" | awk -F',' '{print $1}'
}

do_config() {
        cat <<-EOF
        {
                "builds_dir": "/builds",
                "cache_dir": "/tmp",
                "builds_dir_is_shared": false
        }
        EOF
}

do_prepare() {
        BASE_IMAGE="$(sudo /usr/local/sbin/vm list | grep "${CUSTOM_ENV_CI_JOB_IMAGE}")"
        if [ -z "${BASE_IMAGE}" ]; then
                fatal_error "Base image ${CUSTOM_ENV_CI_JOB_IMAGE} does not exist"
        fi

        sudo /usr/local/sbin/vm clone "${CUSTOM_ENV_CI_JOB_IMAGE}@runner" "${RUNNER_NAME}"
        sudo /usr/local/sbin/vm start "${RUNNER_NAME}"

        BOOT_OK=0
        BOOT_START="$(date +%s)"
        while [ "$(($(date +%s) - BOOT_START))" -lt "${BOOT_TIMEOUT}" ]; do
                IPV4_ADDRESS="$(get_runner_ip)"
                if [ -z "${IPV4_ADDRESS}" ]; then
                        sleep 1
                        continue
                fi
                if [ -z "$(ssh-keyscan -T 1 "${IPV4_ADDRESS}" 2>/dev/null)" ]; then
                        sleep 1
                        continue
                fi
                BOOT_OK=1
                break
        done
        if [ "${BOOT_OK}" -eq 0 ]; then
                fatal_error "VM boot timed out"
        fi
}

do_run() {
        SCRIPT_PATH="${1}"
        RUN_STAGE="${2}"

        case "${RUN_STAGE}" in
                "prepare_script") ;;
                "get_sources") ;;
                "restore_cache") ;;
                "download_artifacts") ;;
                "build_script") ;;
                "step_script") ;;
                "after_script") ;;
                "archive_cache") ;;
                "upload_artifacts_on_success"|"upload_artifacts_on_failure") ;;
                "cleanup_file_variables") ;;
                *) fatal_error "Unsupported run stage '${RUN_STAGE}'" ;;
        esac

        IPV4_ADDRESS="$(get_runner_ip)"

        if [ -n "${CUSTOM_ENV_USER}" ]; then
                SSH_USER="${CUSTOM_ENV_USER}"
        fi

        /usr/local/bin/sshpass -p "${SSH_PASSWORD}" ssh                 \
                -o "StrictHostKeyChecking=no"                   \
                -o "UserKnownHostsFile=${SSH_KNOWN_HOSTS_PATH}" \
                "${SSH_USER}@${IPV4_ADDRESS}"                   \
                "/bin/sh" < "${SCRIPT_PATH}"
}

do_cleanup() {
        sudo /usr/local/sbin/vm stop "${RUNNER_NAME}"
        _tmp="$(mktemp)"
        sudo /usr/local/sbin/vm list | grep "${RUNNER_NAME}" >"${_tmp}"
        while ! grep -i "stopped" "${_tmp}"; do
                sleep 1
                sudo /usr/local/sbin/vm list | grep "${RUNNER_NAME}" >"${_tmp}"
        done
        rm -f "${_tmp}"
        rm -f "${SSH_KNOWN_HOSTS_PATH}"
        sudo /usr/local/sbin/vm destroy -f "${RUNNER_NAME}"
}

ensure_variable_set() {
        eval VALUE="\${${1}+set}"
        if [ -z "${VALUE}" ]; then
                fatal_error "${1} not set, please check contents of ${CONFIG_PATH}"
        fi
}

ensure_program_available() {
        if ! command -v "${1}" > /dev/null 2>&1; then
                fatal_error "'${1}' not found in PATH"
        fi
}

ensure_variable_set BASE_DIR
ensure_variable_set BOOT_TIMEOUT
ensure_variable_set SSH_PASSWORD
ensure_variable_set SSH_USER

ensure_program_available ssh-keyscan
ensure_program_available sshpass
ensure_program_available /usr/local/bin/sudo
ensure_program_available /usr/local/sbin/vm

MODE="${1}"

case "${MODE}" in
        "config") ;;
        "prepare") ;;
        "run") ;;
        "cleanup") ;;
        *) fatal_error "Usage: $0 config|prepare|run|cleanup [args...]" ;;
esac

shift
"do_${MODE}" "$@"
Apply these files rights:
chown gitlab-runner:gitlab-runner /var/tmp/gitlab_runner/.gitlab-runner/executor.sh
chmod 0700 /var/tmp/gitlab_runner/.gitlab-runner/executor.sh
chown gitlab-runner:gitlab-runner /var/tmp/gitlab_runner/.gitlab-runner/executor-bhyve.conf
chmod 0600 /var/tmp/gitlab_runner/.gitlab-runner/executor-bhyve.conf
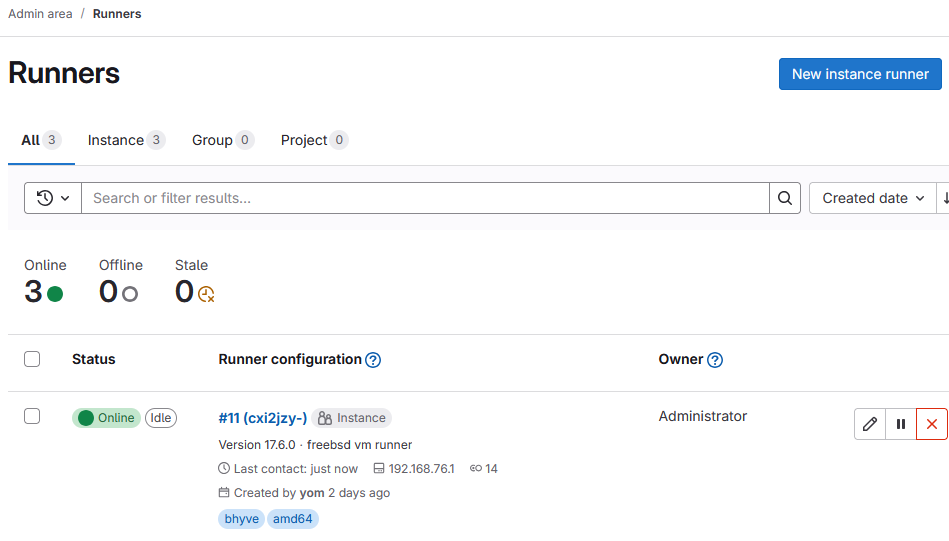
Now, let’s create a new Gitlab Runner from the Gitlab Admin panel:
https://gitlab-instance/admin/runners/new- tags:
bhyve,amd64 - Create runner
- Next page, we use the command printed in the “Step 1”
su -l gitlab-runner -c "/usr/local/bin/gitlab-runner register --url https://gitlab-instance --token glrt-YOUR-TOKEN"
- specify your values during the registration process, and finish the registration
with the
customexecutor
Once your runner is created, it should be “Online”, but we still need to add some configuration
to the config.toml file in the gitlab-runner configuration folder, here is what it should look like:
/var/tmp/gitlab_runner/.gitlab-runner/config.toml
concurrent = 2
check_interval = 0
connection_max_age = "15m0s"
shutdown_timeout = 0

[session_server]
  session_timeout = 1800

[[runners]]
  name = "custom-bhyve"
  url = "https://gitlab-instance"
  id = 11
  token = "glrt-YOUR-TOKEN"
  token_obtained_at = 2024-12-25T13:28:10Z
  token_expires_at = 0001-01-01T00:00:00Z
  executor = "custom"
  [runners.custom_build_dir]
  [runners.cache]
    MaxUploadedArchiveSize = 0
    [runners.cache.s3]
    [runners.cache.gcs]
    [runners.cache.azure]
  [runners.custom]
    config_exec = "/var/tmp/gitlab_runner/.gitlab-runner/executor.sh"
    config_args = ["config"]
    prepare_exec = "/var/tmp/gitlab_runner/.gitlab-runner/executor.sh"
    prepare_args = ["prepare"]
    run_exec = "/var/tmp/gitlab_runner/.gitlab-runner/executor.sh"
    run_args = ["run"]
    cleanup_exec = "/var/tmp/gitlab_runner/.gitlab-runner/executor.sh"
    cleanup_args = ["cleanup"]
Now it’s ready to be used.

Test the custom executor
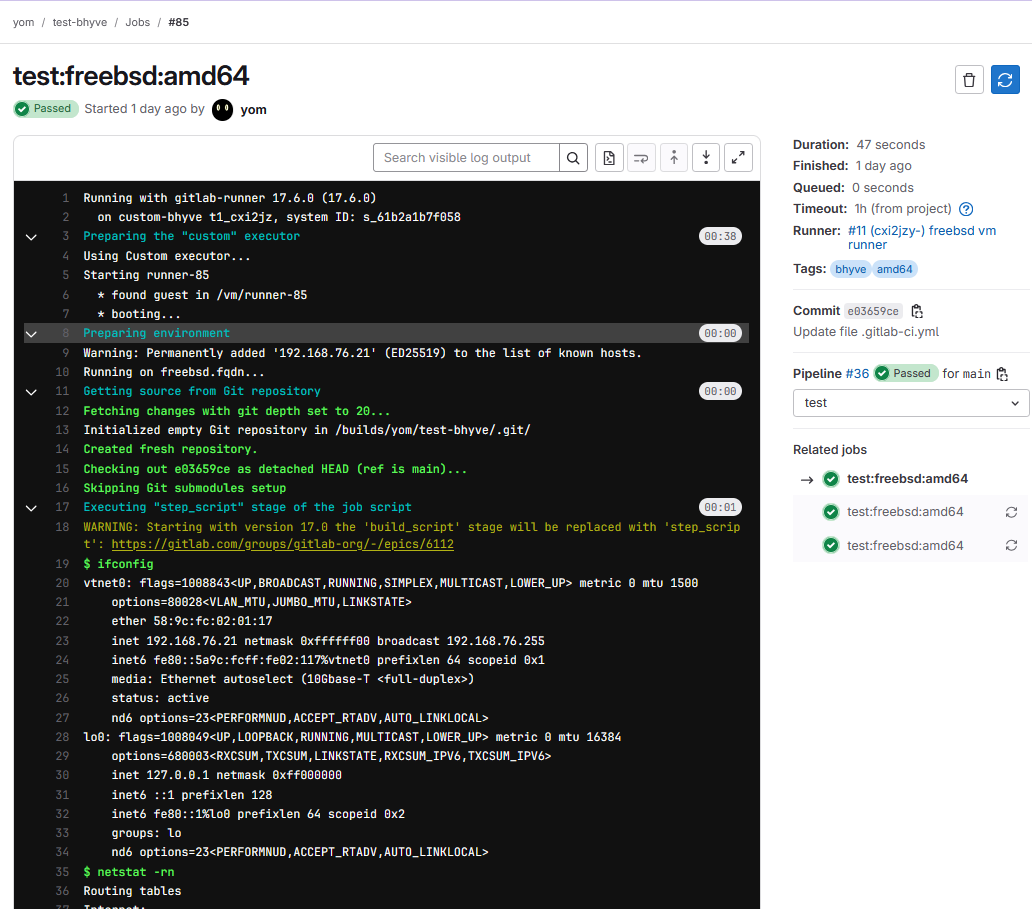
To test our newly created vm-bhyve executor, we just need to create a Gitlab project
and to create a .gitlab-ci.yml file with this sample content:
stages:
  - test

test:freebsd:amd64:
  image: "freebsd-runner-142-amd64"
  tags:
    - bhyve
    - amd64
  stage: test
  script:
    - ifconfig
    - netstat -rn
    - sockstat -4l
    - freebsd-version
    - uname -a
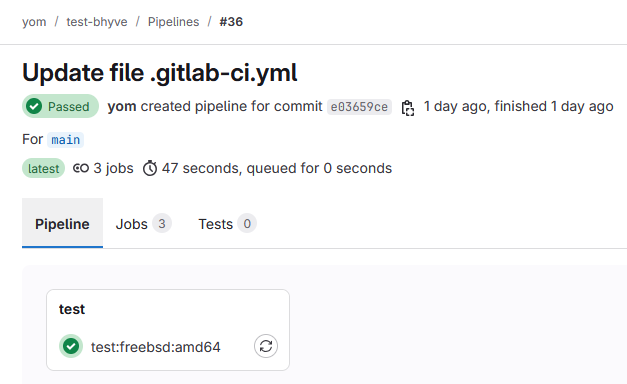
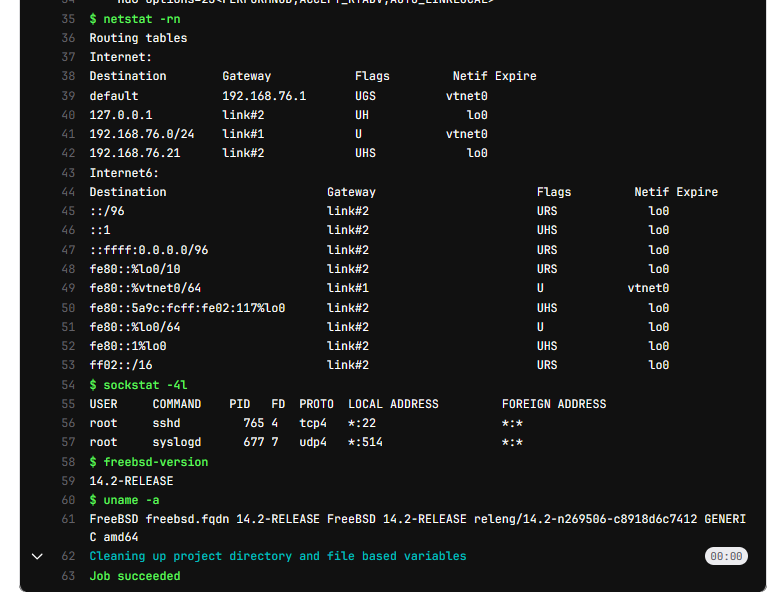
If everything is well configured, the Gitlab CI should runner your CI script in a pipeline and execute completly.


References
- Gitlab: The Custom executor
- ISC: Gitlab Runner Scripts
- ISC Kea DHCP server
- FreeBSD: Bhyve
- Management system for FreeBSD bhyve virtual machines
UPDATES
- fixed many typo
- added essential gitlab-runner
config.tomlconfiguration